Simple DIY Concrete Hearth
Hhere is very nice project to experiment with concrete before diving into a larger project like a concrete counter top. Last year, I made a concrete vanity from white cement and custom aggregates which became fairly complicated with measuring etc. I wanted to give concrete another shot but this time keeping it simple with ready-mix concrete. Concrete is a increasingly fun material to work with as you can really make it into any shape provided you can construct the mold. A quick search of the internet will yeild many variations including embedding object in concrete and acid-etched finishes. I recommend reading “Concrete Countertops” by Fu-Teng Cheng it you want to learn more about concrete as a finishing material. He is pretty much the godfather of concrete counter tops.
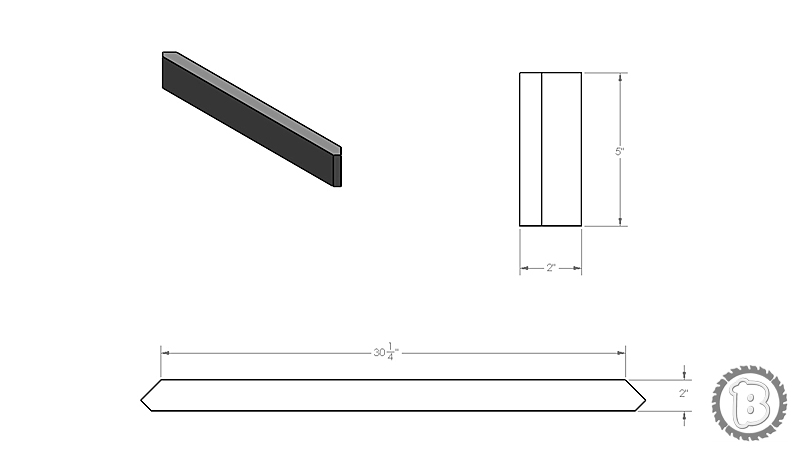
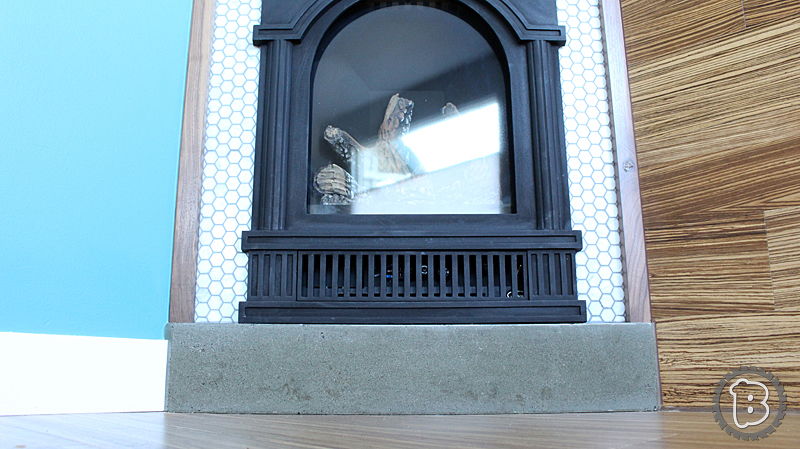
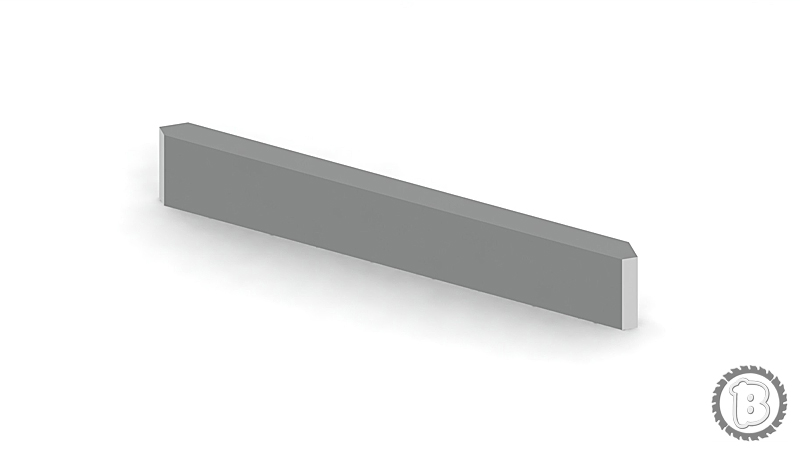
After framing in a new gas fireplace, I felt a single piece of concrete for a hearth would fit the bill nicely for this small space. This hearth is really more of a facade as it is only 2″ thick and is made to fit into a corner on a 45 degree angle. The hearth will be cast face-down in a mold. Molds are traditionally made from Melamine as it provides a nice smooth surface. The total build time for a project like this was a approximately 4 hours (not including curing times of course).
Materials
- Ready mix concrete (1 bag of regular Quickcrete is what I used)
- Melamine
- Superplasticizer (optional)
- Dye (optional)
- Black 100% Silicone
- Drywall screws
Instructions
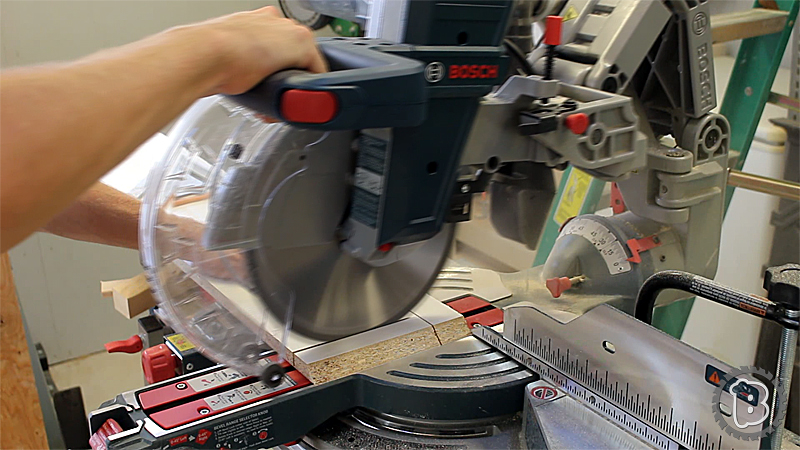
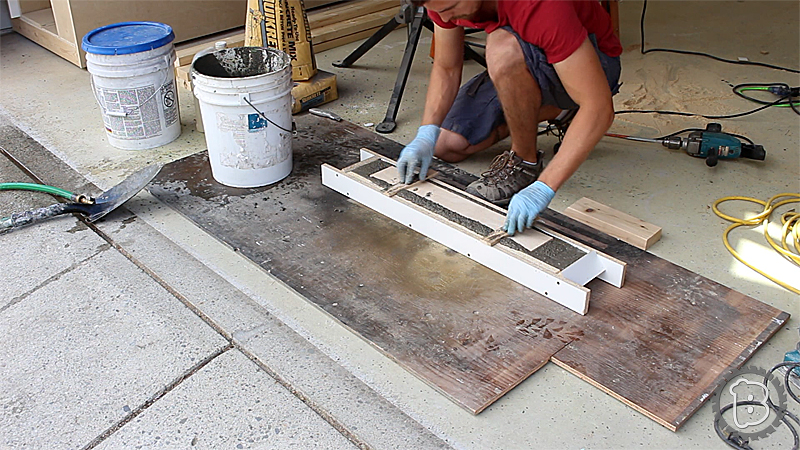
Start by cutting the Melamine to make the parts of the mold. This mold is comprised of 6 pieces, the back is left open to pour in the concrete. Don’t worry about fancy blades and chipping as every inside seam is caulked later.
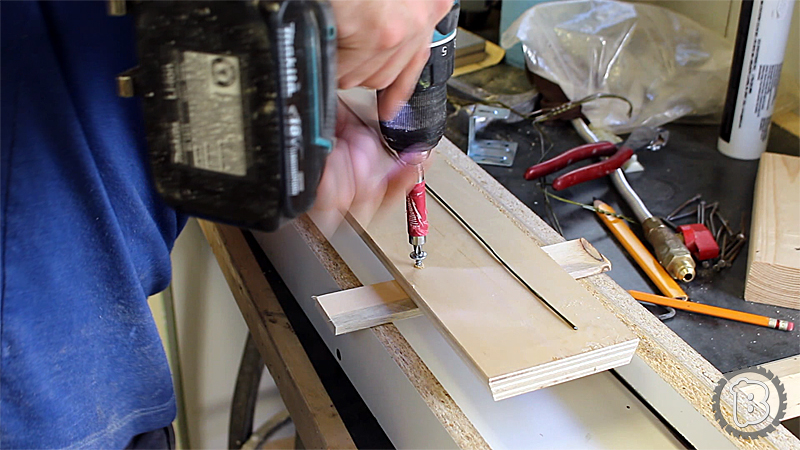
Fasten all the perpendicular parts together using drywall screws. Drilling a pilot hole with a countersink bit will give the drywall screws a stronger bite into the particle board when holding the parts thogether. Caulking all the inside seams is necessary to keep the mold water tight while the concrete cures. If you skip this step the edges of the melamine will swell up as soon as you pour the concrete. Black 100% silicone is used in this step so you can easily see what seams you have covered.


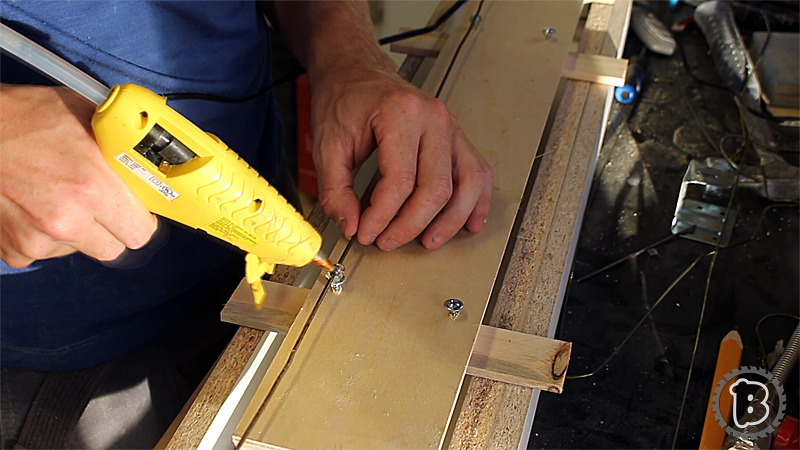
In order to install the hearth you will need include a plywood mounting board. This board also acts as a nice place to attach our “rebar” later. Putting a 5° bevel on to board reduces the chance of it detaching from the concrete. After the mounting board is cut, attach some strips of whatever you have available to prevent the mounting board from falling into the mold when the concrete is poured.


I used old coat hangers to reinforce the concrete. You can really use any heavier gauge wire for this task, just make sure that it is fixed securely and floating inside the mold with 1/2″ or more clearance from any edge of the mold. I started some screws on the mounting board and applied hot glue to fasten all the little pieces.

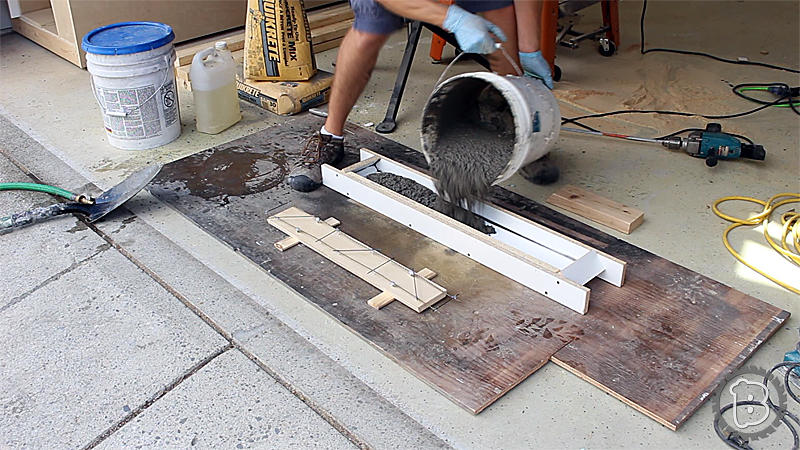
Next, we are ready to pour! I used Superplasticizer from Fishstone I ordered over a year ago for the vanity top I was working on. Superplasticizers (aka water reducers) are an amazing chemical which allow you to keep your concrete flowing nicely without adding too much water. There are some pretty amazing videos of powdered Superplasticizers which make concrete more fluid without adding any additional water. For a piece this size you can forego the Superplasticizer but used it because it was handy. I also used some dark grey pigments from the previous project but I cannot actually say I can see their effect.
Leave some room to place the mounting board into the mold. Wiggle the mounting board into place and tack it down with some easily removable brad nails. Then apply a palm sander without sandpaper on it for 10-15 minutes until you no longer see anymore bubbles.

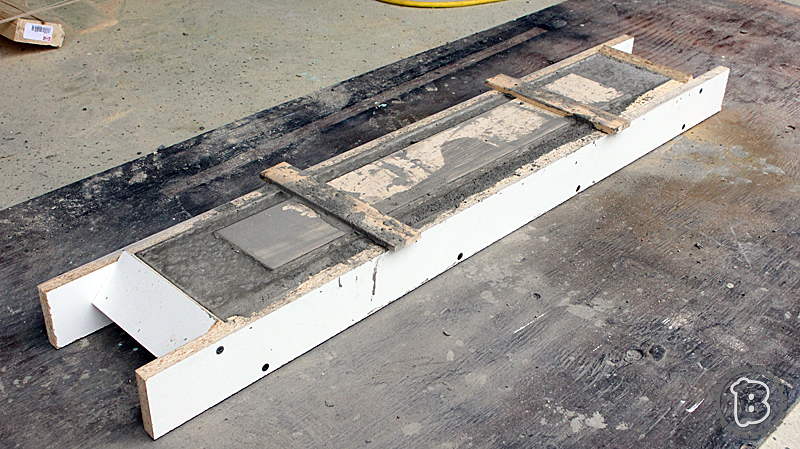
Allow the concrete to cure for a minimum of three days. Release the mold by undoing any fasteners while being careful not to pry on any finished surfaces. Finger work well here!
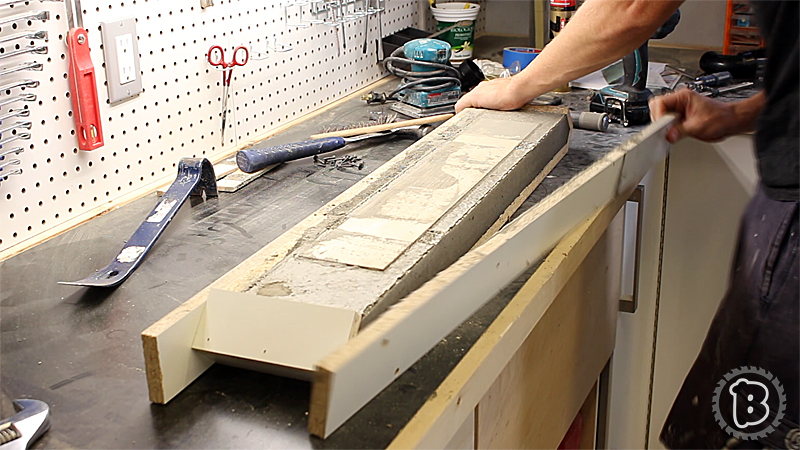
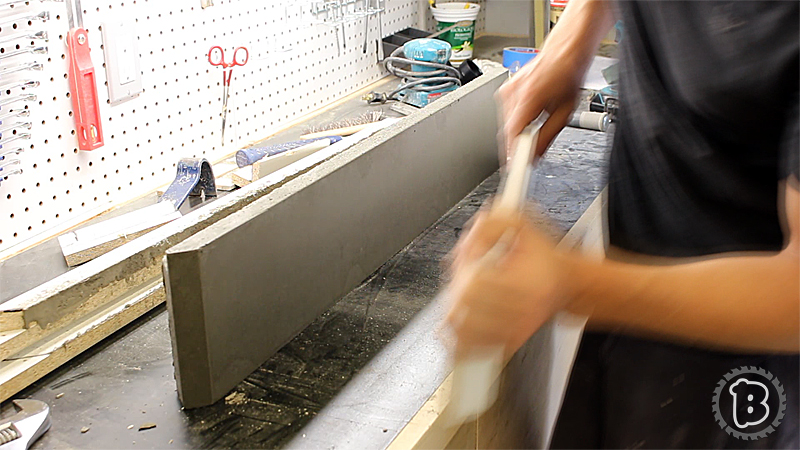
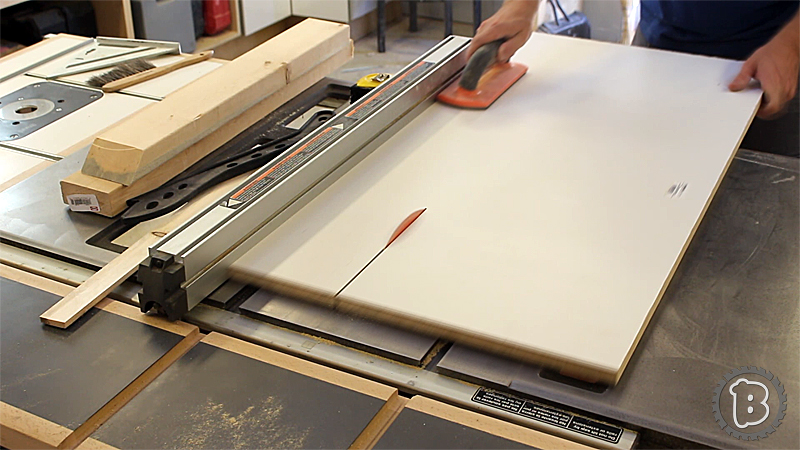
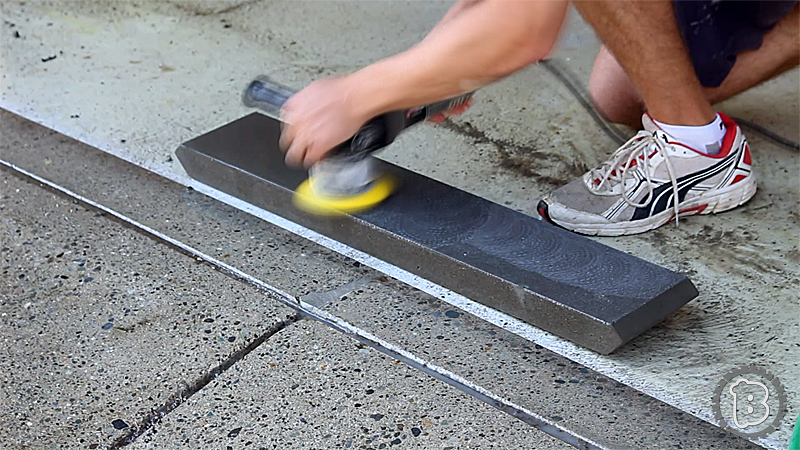
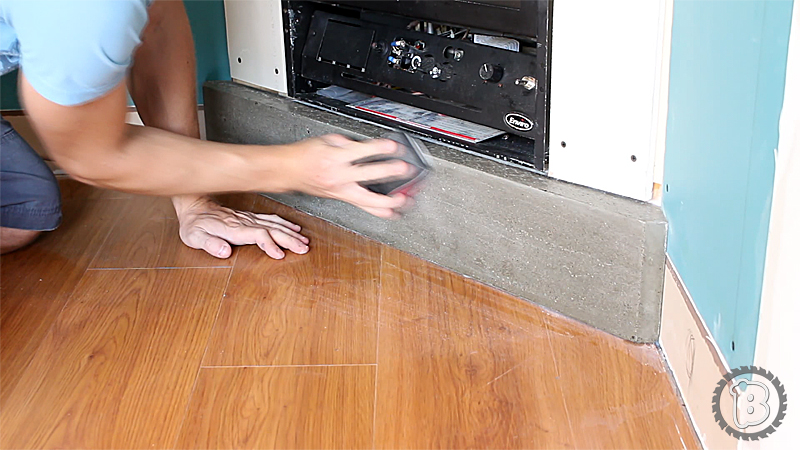
You can leave the finish here and it will look quite nice and uniform. If you want to expose a little bit of the aggregate underneath, you’ll need to polish that slab. I use a Porter Cable Random Orbit polisher with inexpensive Ebay 4″ diamond pads. I prefer to start with a higher grit (approximately 800) and slowly work down the concrete. After only 4 days of curing, the concrete is still quite soft. After you achieve the look you want, Progress through the finer grit you have in your arsenal.
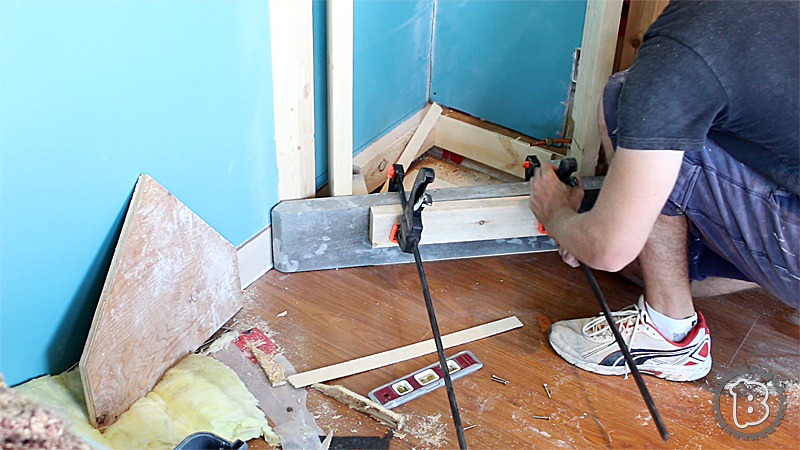
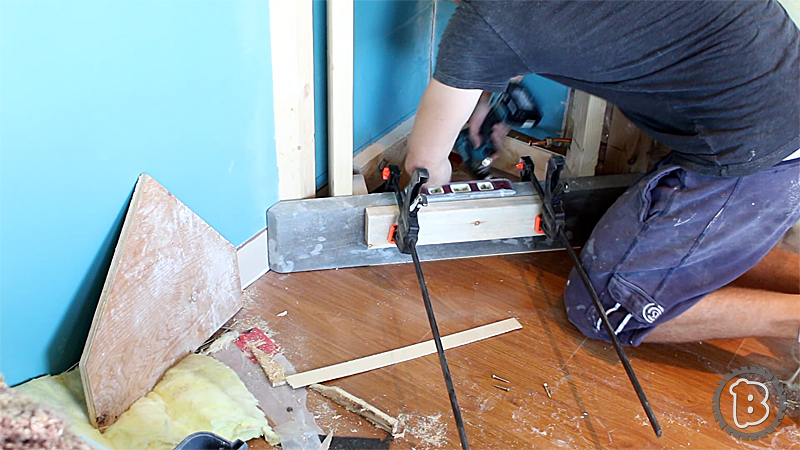
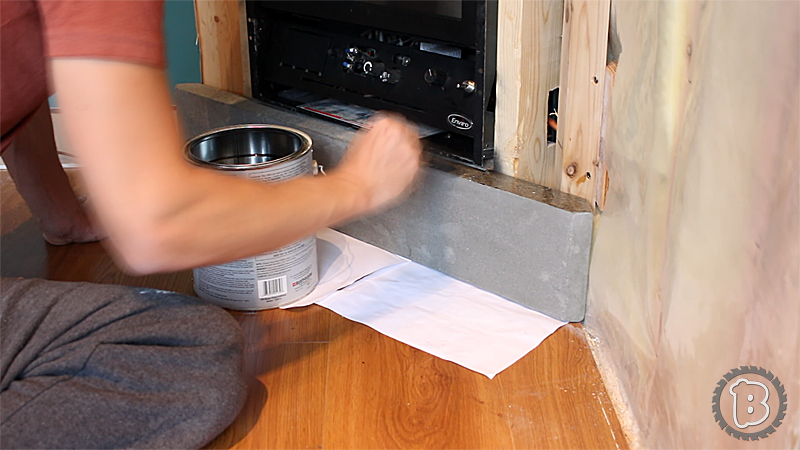
It is preferable to apply you finish while your concrete is laying flat, but unfortunately I needed to get on with a fireplace installation while the gas fitter was on site. Mounting is simple. place a 1/8″ spacer shim under the hearth and screw through the framing and into the mounting board we provided for earlier.
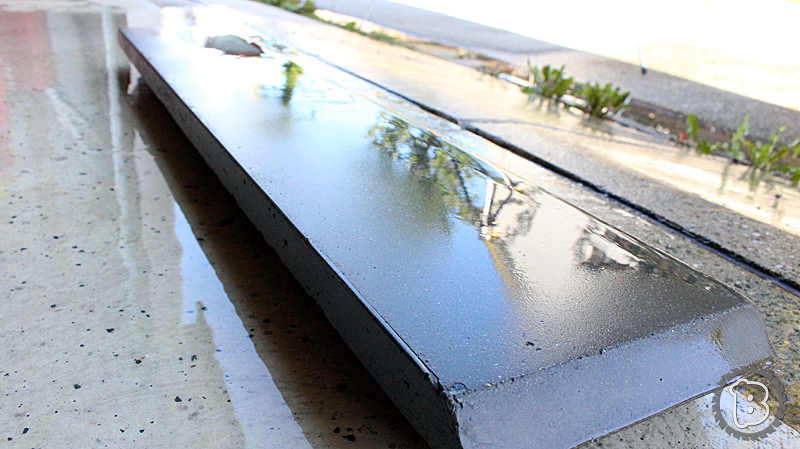
Nothing left to do but apply some finish. I’ve had great results with water and oil based polyurethanes. I prefer a high gloss on concrete but you can use a sheen you like here. Apply 3-4 thin coats. If you so get some streaking/running, give the surface a quick sand with 220 grit sand paper in between coats. Make sure that last coat is very thin and even.
I ended up installing engineered hardwood flooring underneath the hearth which was no problem because the hearth doesn’t even touch the floor.
Thank you for checking out this post. Get Building!


amazing DIY! Thanks for sharing.
Visit Concrete Finishing Summerville